
Two studios can shoot identical weddings and deliver in wildly different timeframes — one in five days, the other in five weeks. The gap is almost never talent; it is the wedding video editing workflow. A repeatable system turns editing from a creative scramble into a predictable pipeline, and that predictability is what lets you take on more weddings without drowning in your edit bay.
Why your wedding video editing workflow decides your margins
Editing is the most time-expensive part of the business, so small inefficiencies repeated across a season add up to weeks of lost time. A defined wedding video editing workflow fixes the order of operations, removes guesswork, and makes the work measurable — you know roughly how long each stage takes, so you can quote turnaround honestly and protect your evenings. The goal is simple: the tenth wedding of the season should take the same hours as the first.
Stage 1: Ingest and back up
Nothing starts until the footage is safe. Offload every card to at least two locations before you format anything — a working drive and a backup, ideally following the 3-2-1 rule (three copies, two media types, one off-site). Never edit off your only copy. Mirror the same folder structure every wedding: one folder per camera, plus separate folders for audio recorders, drone, and second-shooter footage. That consistency is what makes everything downstream repeatable.
Stage 2: Organise and proxy
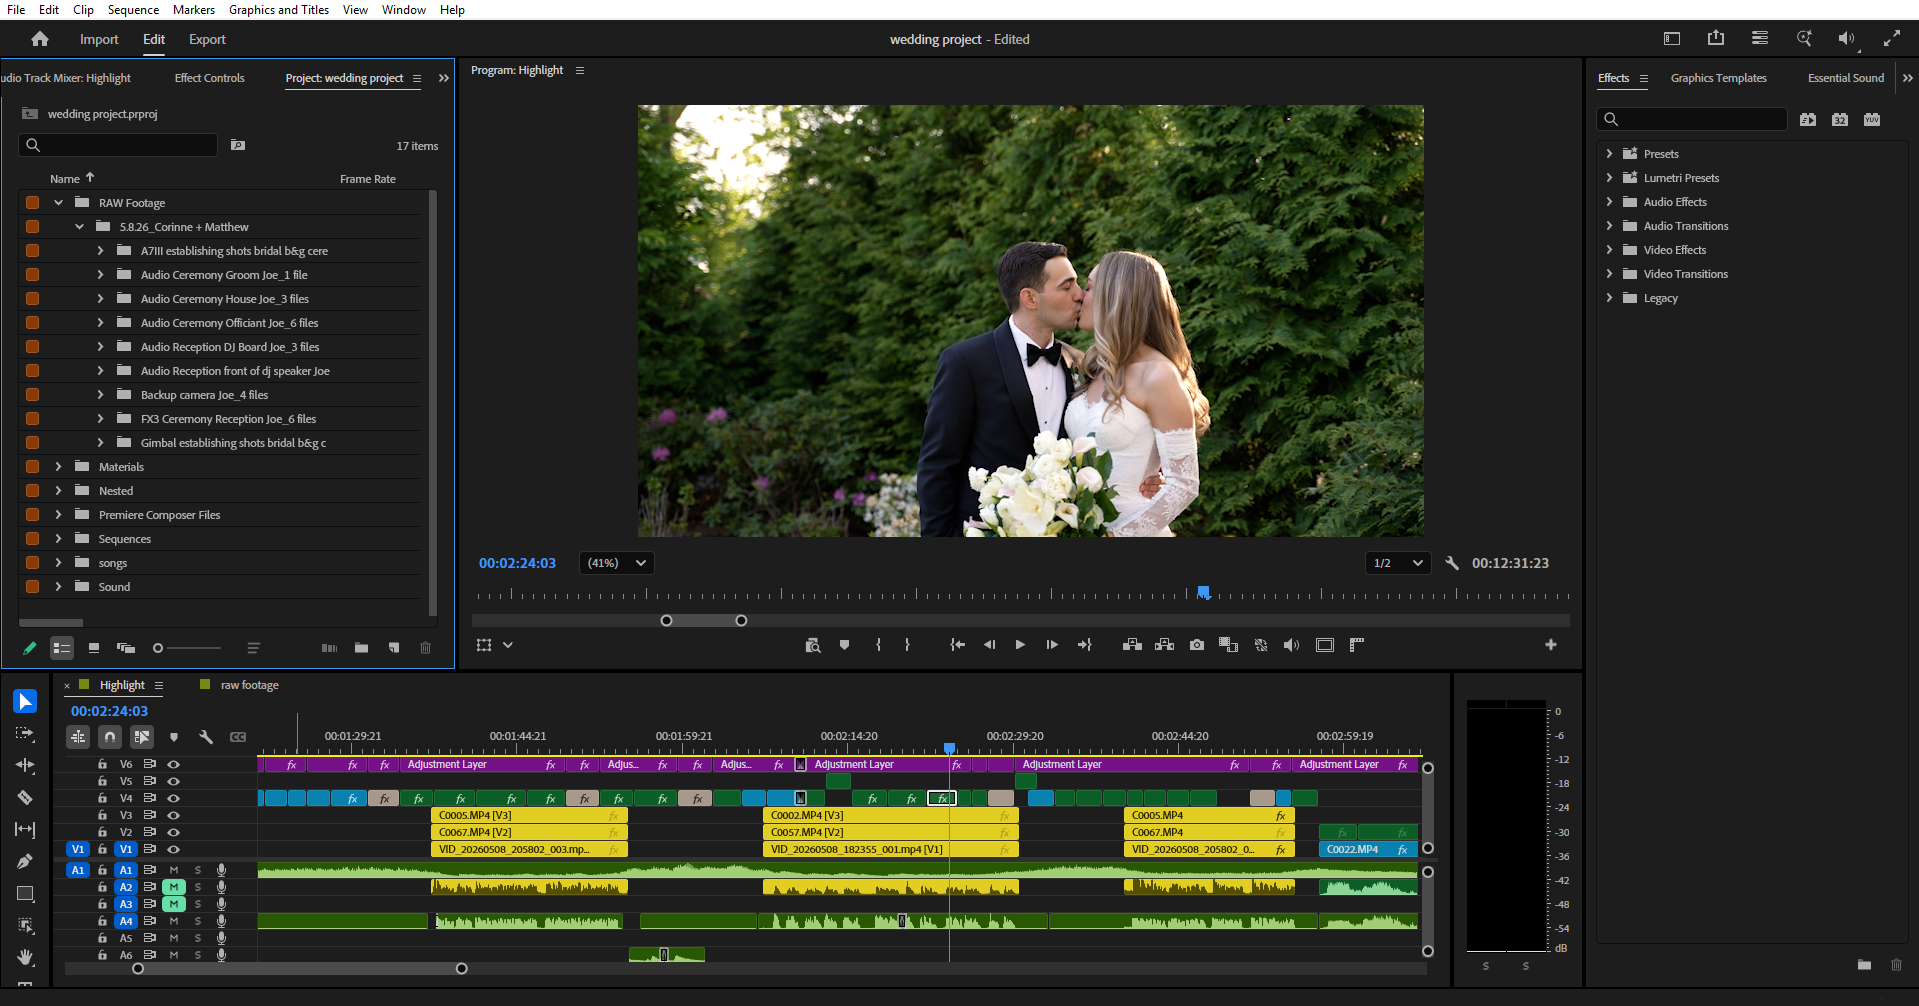
Import into a clean project with labelled bins that match your folders, rename clips as you go, and multicam-sync your angles to a clean audio reference. For 4K and multicam footage, generate proxies so playback stays smooth on any machine, then switch back to full resolution for export. Adobe’s guide to the ingest and proxy workflow in Premiere Pro covers how to automate this on import so it costs you no extra time.
Stage 3: Assembly and story edit
Watch everything once, mark selects, and lay down a story spine before fine-cutting — prep, anticipation, ceremony, emotional peak, celebration. Build a rough assembly that runs long, then tighten it into the final cut. This is the creative heart of the job; if you want the detail on the craft itself, our guide on how to edit wedding videos breaks the editing steps down further. Lock the edit before you move on — polishing a cut you later change means doing the work twice.
Stage 4: Colour, audio, and titles
Only once the edit is locked do you polish. Correct and match your shots, then apply a consistent grade — see our walkthrough on wedding video color grading for the full process. Mix audio in layers so vows and speeches sit clearly above the music, then add titles and any graphics last. Doing these in a fixed order, after the lock, is what keeps the polish stage from spiralling.
Stage 5: Review and revisions
Send the cut for review through a proper review tool rather than email links, so feedback lands as timestamped comments instead of vague messages. Set expectations up front: how many revision rounds are included and what counts as a round. Name your versions clearly (v1, v2, final) and keep them — nothing derails a workflow like four files all called “final.” Capping revisions in your contract protects both your time and the timeline.
Stage 6: Export and deliver
Export to the spec each destination needs — H.264 or H.265 at the right resolution and bitrate for web and social, plus a higher-quality master for archive. Save these as export presets so you are not rebuilding settings every time. Deliver through a branded gallery or download link with clear file names, and confirm the couple can actually download and keep their films.
Stage 7: Archive and back up
Keep the full project and source footage backed up in two places until well after final sign-off — re-export and re-edit requests are routine months later. Archive completed weddings to dedicated drives or cold cloud storage on a schedule, and document where each one lives. Losing a finished project to a dead drive is not an inconvenience; it is a reputation problem.
Templatise everything (the real secret)
The difference between a slow editor and a fast studio is templates. Save a project template with your bin structure, your sequence settings, title styles, transition and Lumetri presets, and export presets baked in. Write a one-page checklist for each stage. Done well, this means any editor on your team produces the same result, and your wedding video editing workflow survives being tired, busy, or scaled across multiple people. Systemise the repeatable parts so your attention goes to the creative decisions that actually differentiate the film.
Where the workflow breaks — and what to do
Even a tight wedding video editing workflow has a ceiling: there are only so many hours, and during peak season the edit and the grade are where everything backs up. When delivery times start slipping, the fix is not working later nights — it is offloading the post-production so you can keep shooting and booking.
That is where we come in. Love Story Editing plugs into your workflow as your edit team through our wedding video editing service — pick a teaser edit, a ceremony edit, or a full wedding film. See the work on our video portfolio, or request a quote.
The takeaway
A strong wedding video editing workflow is just a fixed order of operations — ingest, organise, edit, polish, review, deliver, archive — backed by templates so it repeats without thought. Build it once and your turnaround tightens, your quality stays consistent, and you stop reinventing the process every wedding. And when the workflow hits its ceiling in peak season, delegating the edit is how you scale past it without sacrificing the work.
IMAGE INSTRUCTION (Wedding